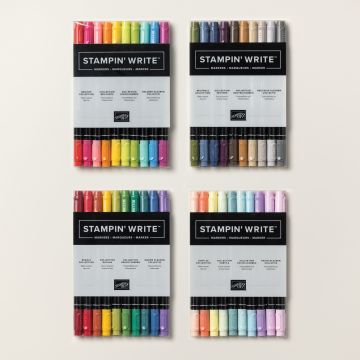
Announcing the Retirement of Stampin’ Write Markers
Hold onto your crafting hats because we have some bittersweet news to share! We’re bidding a fond farewell to our beloved Stampin’ Write Markers, and trust me, you won’t want to miss out!
As of August 20, 2025, these colorful companions will make their way to the realm of Last Chance Products, available only while supplies last!
Why not add a splash of color to your projects before they vanish! Get your creative juices flowing and share your favorite masterpiece using these markers. Keep your craftiness alive and make the magic happen! Don’t let them slip through your fingers and grab them while you can! You can purchase the entire regular line of markers as shown here or in individual color sets plus the current In-Colors.
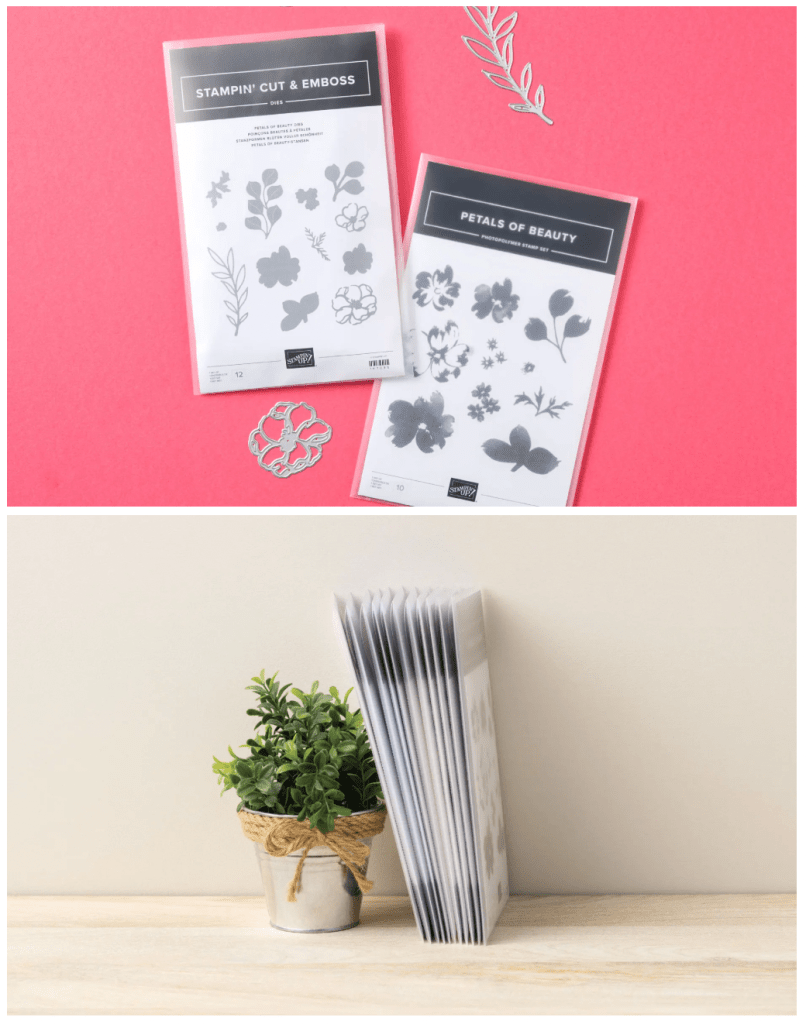
Cling Stamps Are Being Phased Out
If you’re like me you loved that red rubber for the crisp clear images but key raw materials needed to make cling stamps (red rubber stamps) are becoming increasingly difficult to come by some no longer being manufactured at all! In addition, so many love the clear photopolymer stamps because they’re so easy to position since you can see through them. Change, my dear friends, is always hard but this will also be a good thing.
Because photopolymer are thinner we will be transitioning to a sleeker, slimmer packaging. This will mean it takes a lot less space to store stamps which is amazing! In fact, stamps AND dies will now come in the same size and style of packaging, making it easier than ever to store bundles and coordinating products together. The new packaging is similar to our current die packaging—durable, clear plastic envelopes—but with an exciting improvement: Die packaging will now feature printed artwork for quick and easy identification! Stamp packaging will continue to display artwork, too. The new organizers will be available for purchase separately in packs of 10 as part of the November 2025 Online Exclusives. And the current DVD-style stamp cases will continue to be offered while there is demand for them.
I don’t know about you but I’m truly excited for the new changes. It will take thinking about new ways to store my stamp and die bundles but since it takes up less space, I’m excited to see what will be on the horizon for stamp storage. I hope you’re excited, too!! Let me know your thoughts below! I’d love to hear from you.
The Workshop Kit includes precut DSP, page protectors, exclusive stamp sets, cardstock, embellishments, and more! The Virtual Retreat is July 16-18, 2:00 – 10:00 PM (MTN), Space is Limited. The Live Workshop is included when you purchase the kit; however, you do not have to watch Live. It will be recorded and available to watch later.
I will be doing much of the kit “live“. If you’d like to do it live and want to join me so you can use my supplies, let me know and we’ll work out the details.
Here are some ideas to get you started…
· Highlights of each month through the year · First or last year of high school or college · Document trying one new thing a month · Photos of your day-to-day life · Baby’s First Year · Favorite Quotes and Scriptures · Retirement · Date Nights! · Your own writing, doodles, or quotes
Or you can use a monthly theme! Here are some ideas…
January – New Beginnings, Intention, Vision February – Love and Friendship March – Luck, Growth, New Energy April – Renewal, Change, Acceptance May – Celebration, Outdoors, Joy June – Sunshine, Adventures, Confidence July – Fun, Family, Play August – Back to School, Lazy Days, Transition September – Cozy, Change, Reflection October – Strength, Spooky November – Gratitude, Gatherings, Presence December – Magic, Memories, Celebration, Closure
Supplies List to complete as designed (if you want to watch the Live presentation and use my supplies, let me know):
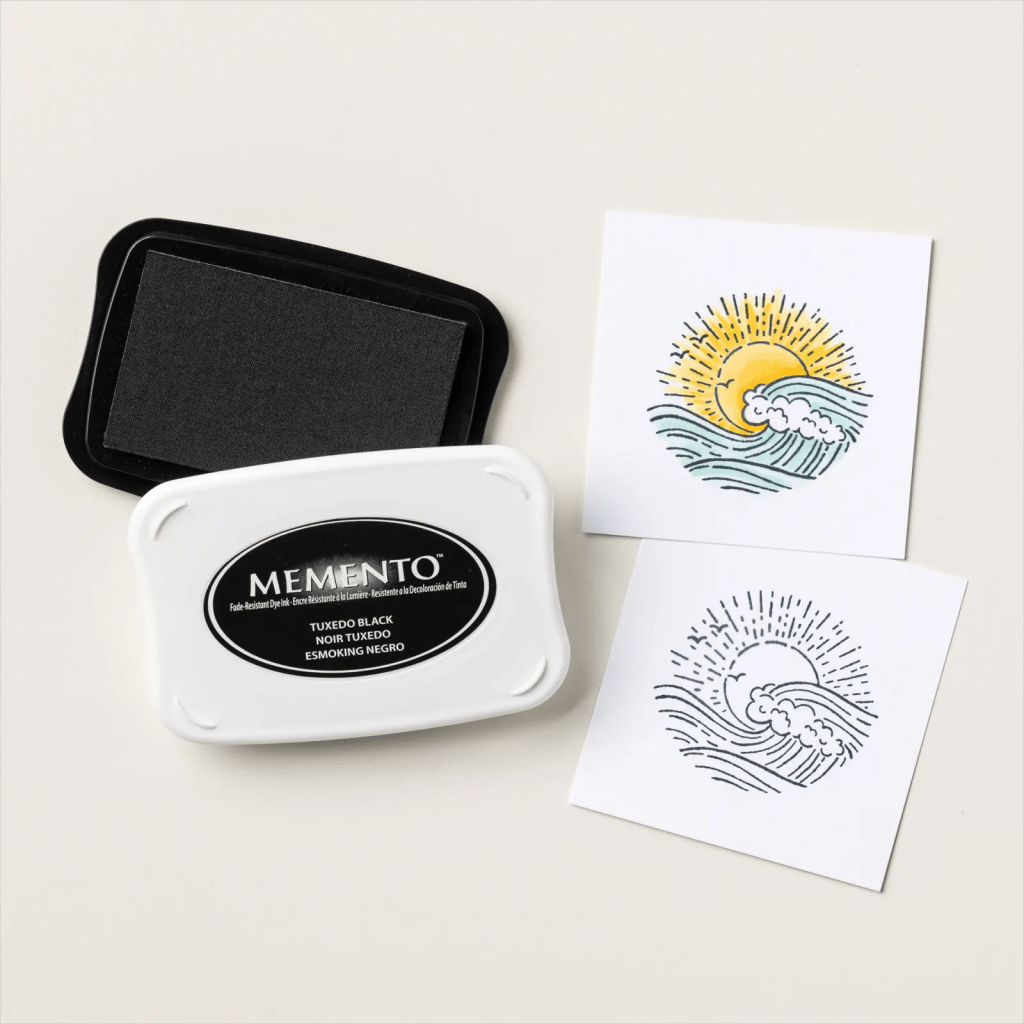
INK ■ Cherry Cobbler Classic Stampin’ Pad™ (147083) ■ Darling Duckling Classic Stampin’ Pad (165277) ■ Garden Green Classic Stampin’ Pad (147089) ■ Lost Lagoon Classic Stampin’ Pad (161678) ■ Misty Moonlight Classic Stampin’ Pad (153118) ■ Mossy Meadow Classic Stampin’ Pad (147111) ■ Pecan Pie Classic Stampin’ Pad (161665) ■ Pumpkin Pie Classic Stampin’ Pad (147086) ■ Soft Sea Foam Classic Stampin’ Pad (147102) ■ Stampin’ Journaling Pen (166647) ■ Tuxedo Black Memento™ Ink Pad (132708)
TOOLS ■ Bone Folder (102300) ■ Clear Block B (117147) ■ Clear Block D (118485) ■ Clear Block H (118490) ■ Paper Snips Scissors (103579)** ■ Paper Trimmer (152392) ■ Stampin’ Pierce Mat (126199) or sturdy cardboard***
OTHER ■ Eraser ■ Masking tape or sticky notes ■ Pencil ■ Ruler ■ Scratch paper ■ Stamp cleaning supplies ■ 1″ (2.5 cm) circle punch or die (optional) ■ 1/4″ (6.4 mm) or 1/2″ (1.3 cm) circle punch or die (optional) *We will use Blending Brushes on six different colors
**In addition to regular cutting, we will use the tips of the Paper Snips Scissors to cut slits in some of the Memory Protectors™. If you aren’t using these specific scissors, you may also need a craft knife. ***The cardboard must be able to fit inside a 12″ x 12″ (30.5 x 30.5 cm) Memory Protector. If it doesn’t fit, you may not be able to complete some of the crafting techniques.
I’m often asked what items do I need to start crafting. And, of course, part of that answer is what are your plans for your crafting? If you’re going to make cards and/or scrapbooks I have a starting list for you below. But many of the items are universal crafting items as well. Below I’ll list the items I like and use along with the item # for US purchases from Stampin’ Up! and why you need the tool or why I suggest it.
Paper Snips – 103579 – Paper Snips are a staple tool for expert cutting even in small areas. The precision-ground stainless steel tips cut cleanly all the way to the end of the blades. I use mine every day for ribbon (I even have a 2nd one strictly for ribbon), and cutting what we call “fussy cutting” meaning we cut out little paper objects.
Paper Trimmer – 152392 – Cut and score paper for card making, scrapbooking, and other paper crafts with our durable, and portable Paper Trimmer. The extra-wide 7-3/4″ cutting base is extendable 17″ ruler accommodate large paper projects. The base of the paper trimmer includes both imperial and metric measurements, and the base has a midpoint ruler for small paper projects. The ruler and paper restraint snap into place for easy transport. A durable plastic cover protects the ruler and grid so measurements won’t wear off.
One of my favorite things about our Paper Trimmer is that it cuts and scores! I’ve seen many crafter videos where they have to have 2 tools, one for cutting and one for scoring. Ugh! The trimmer is light weight so it travels well, too. Going to a craft along or traveling and want your trimmer, no problem.
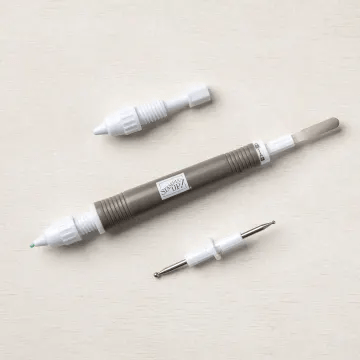
Take Your Pick Tool – 144107 – Multipurpose pickup and precision tool simplifies meticulous tasks. Tacky putty end easily picks up sequins, paper accents, and other small objects; twist to dispense more putty. The other end has 2 changeable, double-ended tips with paper piercer, mini spatula, small stylus, and large stylus. Plus the attachments (also shown below) which can be used for cutting or piercing (161602) and the brush tip (149655) for cleaning cuts from dies.
Stampin’ Dimensionals – 104430 – Double-sided adhesive foam dots add depth and dimension. Great for heavier embellishments, too. Instant bond. Acid free. Stampin’ Dimensionals®: 300 pieces, 3/8″. On cards and in scrapbooks giving your layout dimension makes it more interesting, gives shadows and depth. Also available are mini dimensionals (144108) and black dimensionals (150893) in both sizes.
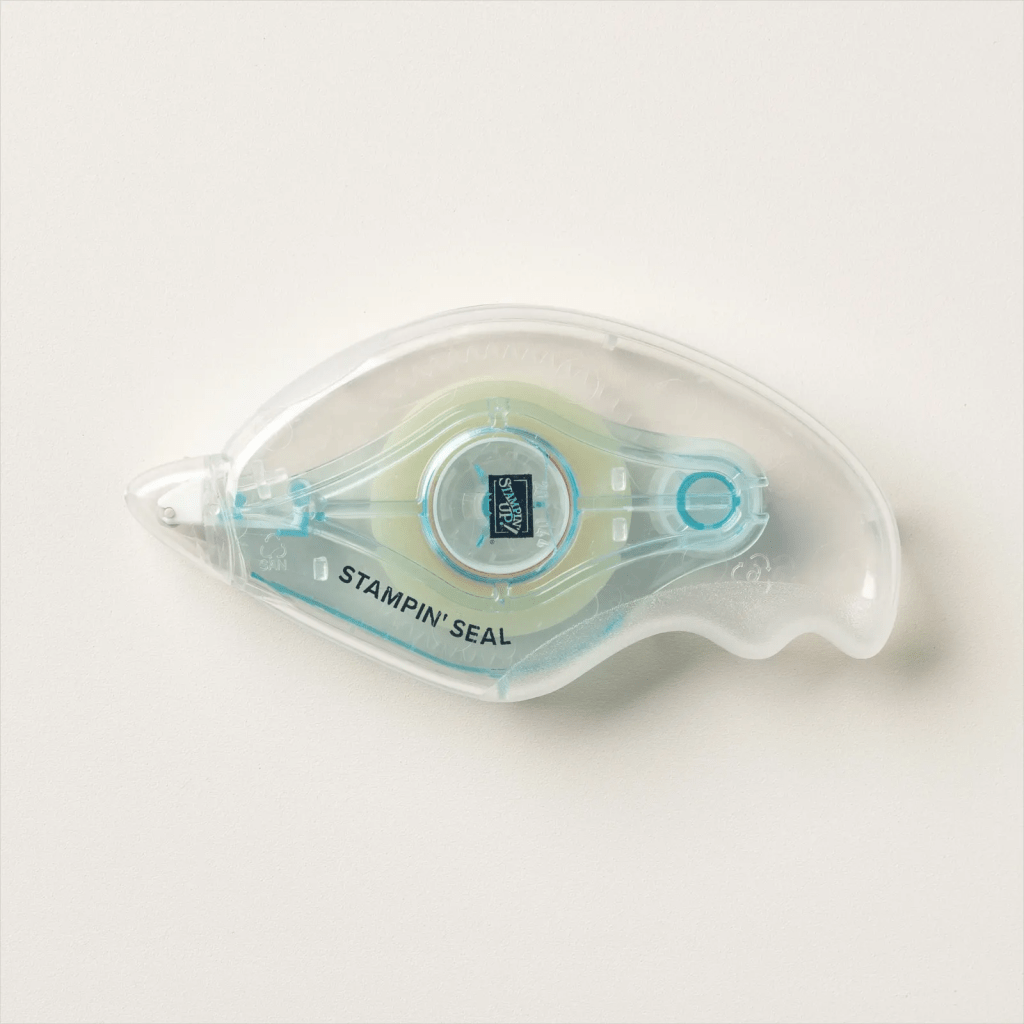
Stampin’ Seal – 152813 – Instant-bond, double sided permanent adhesive. Holds cardstock and ribbon. Acid free. Also, available is the Stampin’ Seal+ (149699) which is stronger than the normal Seal.
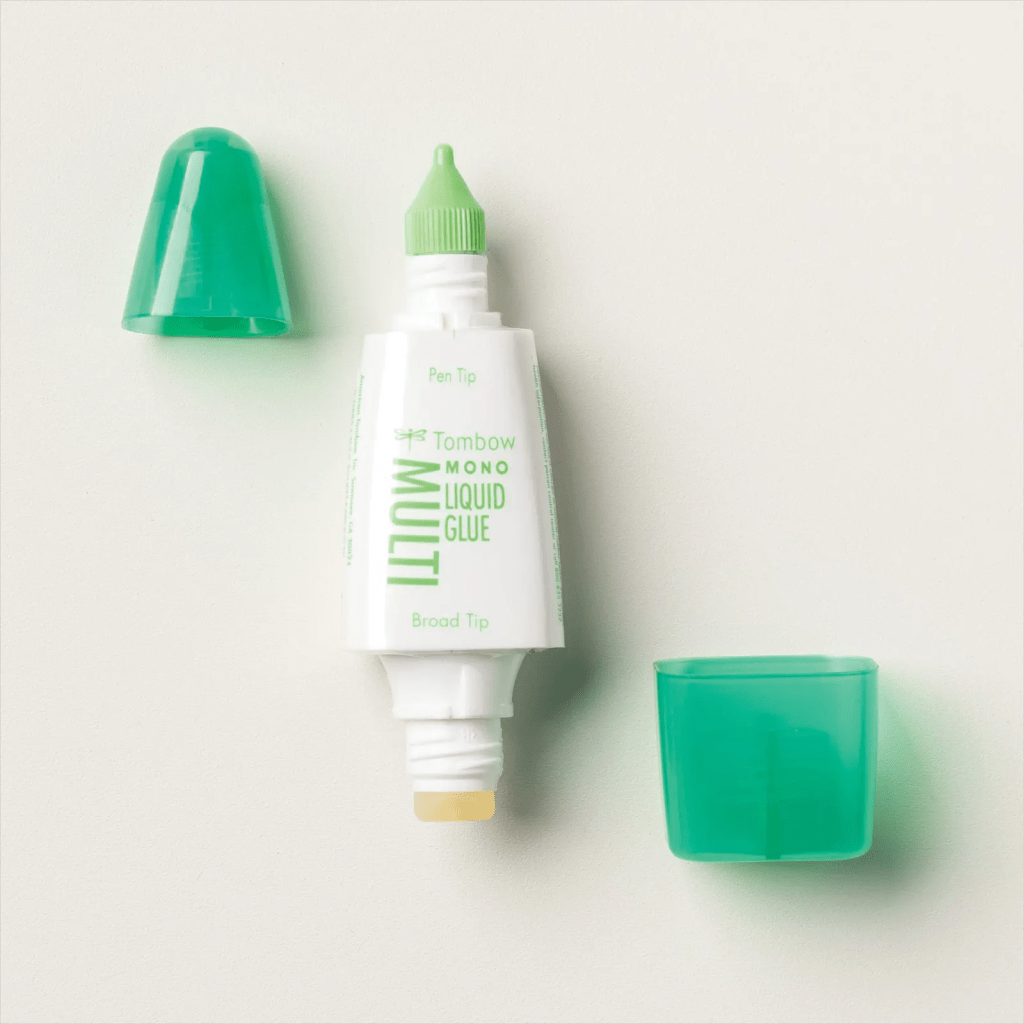
Usually a crafter will have a favorite adhesive, most of the time it’s either Seal or the Multipurpose Liquid Glue (110755). Personally I use both depending on what I’m doing. If it seems I might need room to move the item I use the “green glue” so once you’ve laid it down on the other layer you can adjust the placement if needed. It’s not green but the bottle is. It dries clear.
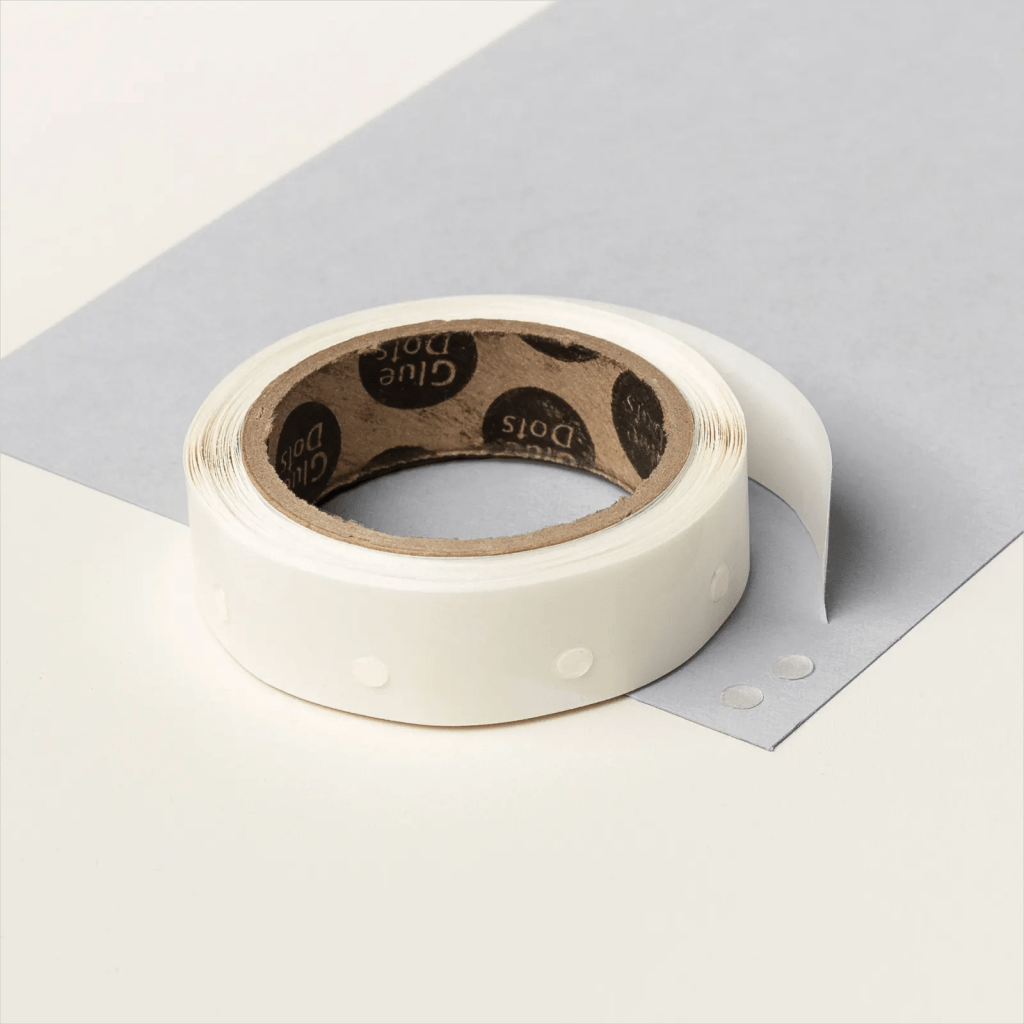
Glue Dots – 103683 – Instant dots of adhesive. No fumes, no mess, no drying time. Holds heavier embellishments, ribbon, cardstock, and detailed die cuts. Glue dots work nicely for small things especially like ribbon or embellishments in my opinion.
Silicone Craft Sheet – 127853 – Easily assemble embellishments, with our silicone craft mat–just put a dot of adhesive on the sheet and use both hands to assemble the embellishment, then pop it off the sheet when the glue is dry. Additionally, use it to stamp in reverse, if your stamp faces right but you want it to face left use the silicone mat. Stamp directly on the malt and then pick up on your cardstock. Voila a reverse stamp. OR suppose you’ve put your adhesive on a layer of your card but then realize you aren’t ready to attach it. Lay it on the silicone mat adhesive down, work on the layer till you’re ready then turn it over and attach it.
Tear & Tape Adhesive – 154031 – This Tear & Tape Adhesive will have you ready to adhere with ease. The strong, acid-free adhesive is perfect for multiple uses; it can be torn to fit just the right size. Tear off the size you need, place the adhesive, then remove the backing sheet and you’re ready to stick with it! My favorite feature is that you can tear it to size, attach to your piece, but not tear off the 2nd side for as long as you need to wait. Maybe you’re creating a bunch of layers but need to wait till everything is ready before attaching.
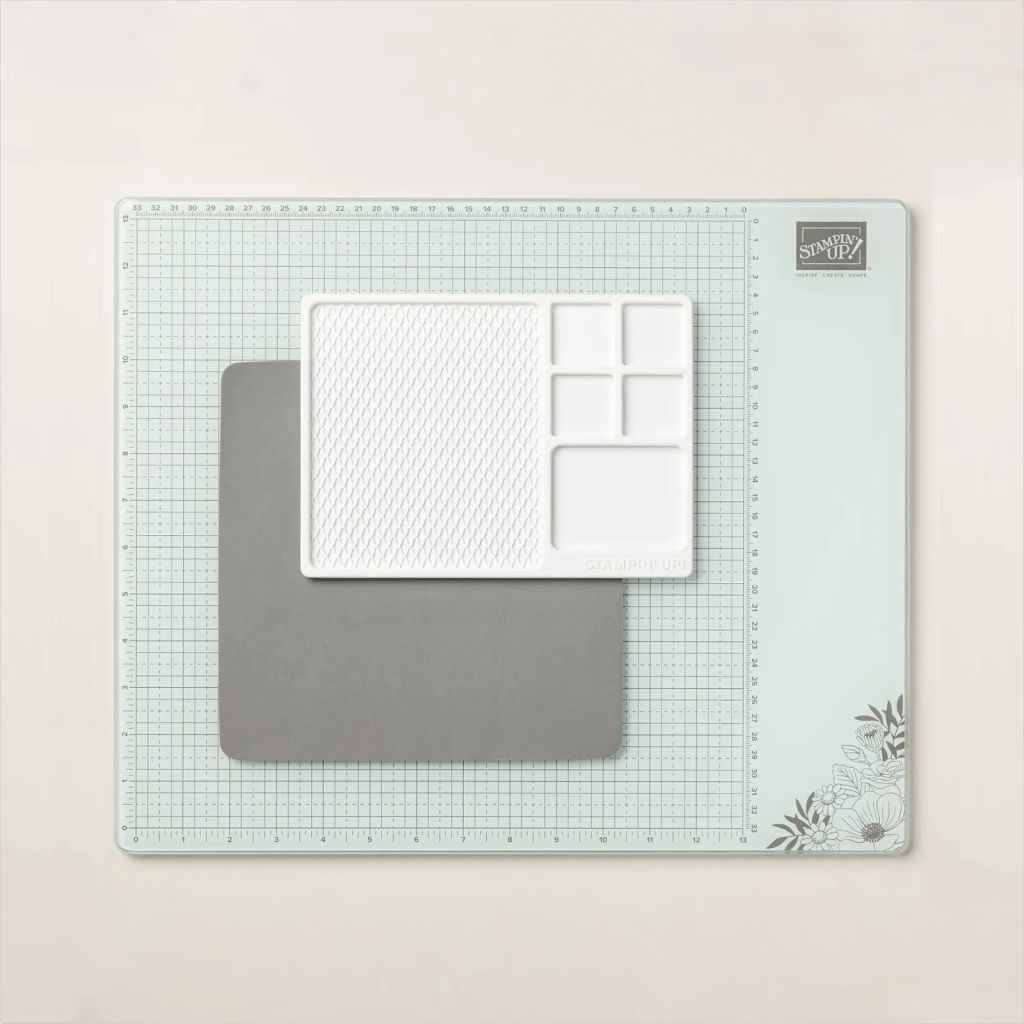
Stampin’ Glass Mat Studio – 163987 – The Stampin’ Glass Mat Studio is a paper crafter’s dream! The heavy-duty glass mat comes printed with a ruler and grid lines for easy measuring, while the large surface space gives ample room for spreading out while paper crafting. The safety-tempered glass has a heat and scratch resistant surface that wipes clean with the included cloth and water—no chemicals needed. The reusable cloth also cleans ink off your stamps! The nonslip, heat resistant, waterproof silicone mat features four palette squares for mixing custom ink colors or for holding small ink spots in place while crafting. Each component can be used separately or you can use all three items together for a multipurpose paper crafting studio that’s both functional and elegant.
Simply Shammy – 147042 – This reusable stamp cleaning cloth makes stamp cleaning effortless. Just add water, then wipe stamps on the shammy. Durable, thick lint-free shammy easily cleans ink from narrow grooves. (Ink will stain shammy but won’t transfer to your fingers or other stamps.) With its portable 5″ x 7″ size it fits neatly in a stamp case. The Stamp Case comes in sets of 4 (119105).
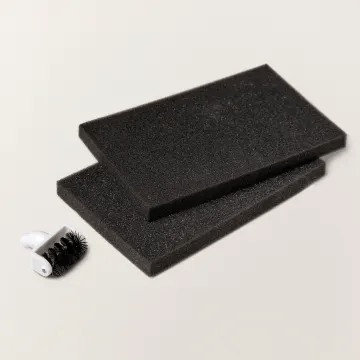
Clear Block Bundle – 165674 – Use our high-quality, reusable acrylic blocks for all of your cling rubber stamps and photopolymer clear stamps. Stamp blocks are grooved for easy gripping and clear so you can see right where you’re stamping. Temporarily mount stamps on clear blocks for stamping, then remove for storage. Save 10% on this clear block bundle that includes all of our block sizes, so you’ll always have the block you need on hand. Individual blocks can be purchased and if so I’d advise getting the most used block, the D block is 118485.
Stamping Inks – I’m not listing an item number per se because we have 50 colors plus black and VersaMark which is great for heat embossing. Were I suggest an ink to start with, I’d suggest the Memento Tuxedo Black Ink (132708) because every crafter needs a go-to black ink. After that I’d get at least 2 or 3 colors. Maybe you’d want a red, a blue, a green, maybe a blue. Then along with that I’d get the matching color of cardstock.
Basic White Cardstock – 159276 – Our Basic White 8-1/2″ x 11″ Cardstock is great for handmade cards and other paper crafts. This classic, heavyweight cardstock is high quality, acid free, and lignin free, making it a favorite scrapbook paper, too. Plus, our Basic Black Cardstock (121045) is an essential.
Additionally, you’ll want a stamp set. Here’s a great sentiment set, With You In Mind (164747) but there are many other options. Look through the ones available and see what appeals to you. You might also like to watch YouTube videos or check out Pinterest to find some you really like.
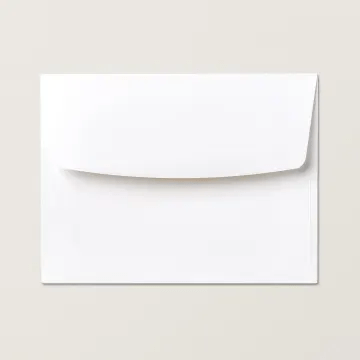
Medium Envelopes – 159236 – Provide the perfect finishing touch for your cards. Fits standard 5-1/2″ x 4-1/4″ cards.
So, all that is a place to start. What do you want or need. You may already have a paper trimmer or paper snips (at least one pair should be a smallish one). Maybe you already have a good adhesive; however, I strongly advise against school glues like Elmers – they’ve got too much water and will buckle your cardstock and most stick glues just won’t hold. If you have a glue like Art Glitter Glue though that will work very nicely.
All of this sounds like a lot but if you get what you can as you can and start where you are and with what you have you can make some beautiful cards or scrapbook pages. Don’t wait till you have it all. Start now with what you have. At its most basic you’d want white cardstock, a trimmer, a black ink pad, a stamp set, a block and envelopes.
Feel free to let me know if you need help. If you need more suggestions.
Choose wisely! What does that mean to you? Maybe it means to choose where to live or what job or it could even mean which items to choose as you start with Stampin’ Up.
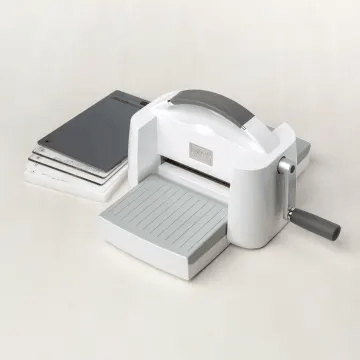
When you decide to start as a demonstrator YOU get to choose the papers, inks, tools, that you need or want. It’s YOUR choice. Do you need some tools, maybe the Stampin’ Cut & Emboss Machine?
Maybe you need some of the ink colors.
RIGHT NOW, with the current join special you can get two of the Stampin’ Write Marker Sets shown below…yes, TWO with your kit!! They’re extra or an added benefit to starting your journey now before the end of February. Which two will you choose? Plus a stamp set. OR you can choose to get $30 more than the $125 in the starter kit. Which means you’d get to choose $155.
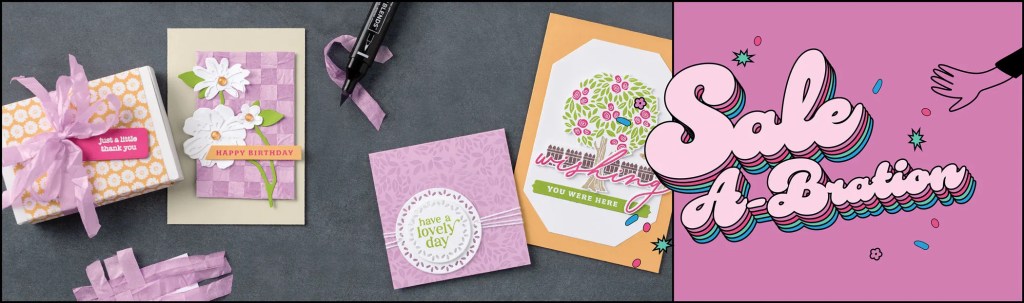
If you’ve been thinking about becoming a Stampin’ Up! demonstrator, then there’s no better time than right now during Sale-A-Bration! When you join by February 28, 2025, you can choose between two fabulous offers:
Option 1: Get $125 worth of product PLUS a choice of two Stampin’ Write Marker Assortment packs AND the Handmade Designs Cling Stamp Set (an exclusive stamp set designed to work with the markers). That’s a $216 value for just $99!
Option 2: Get $125 worth of product PLUS an additional $30 worth of product when you join Stampin’ Up! That’s a $155 value for just $99!
The WAIT is OVER!! Can you believe we have so, so many new products…packed with fresh inspiration and creative possibilities!! Wow, it’s an exciting time and there are so many great new things to see and explore!! What do you want to add to YOUR stash. The launch of a new catalog or catalogs is always an exciting time! Each catalog is packed full of inspiration and fun NEW products!
Sale-a-Bration – This is our once-a-year event lasting two months, January and February which means you earn a FREE product (stamps, dies, ribbon, embellishments, or DSP – Designer Series Paper) for every $60 or $120 purchased in the USA and there’s no limit to how many items you can earn…whoot!
JOIN Special – There’s never been a better time to join…You can choose $125 worth of product from ANY catalog or online and pay only $99 PLUS get FREE shipping!! Then there are TWO, additional options this year. Either choose to get an additional $30 in FREE product OR get the Handmade Designs stamp set (shown below) along with your choice of two sets of Stampin’ Write Markers (color collections – Brights, Neutrals, Regals, or Subtles). If you have any questions feel free to get in touch! Click HERE to get started!
Scrapbooking Brochure – CTMH (Close to My Heart) has joined with Stampin’ UP and we now offer new branding for many items. We’ve tried to get things out to everyone as soon as we could so do not have a physical catalog yet. Here’s a link to the new digital catalog and OH MY!! We have some amazing scrapbooking layout kits which include 3 2-page spreads in each kit for a total of 6 pages. Additionally, there are stamp sets that coordinate plus two-tone 12×12 cardstock and DSP that perfectly work together.
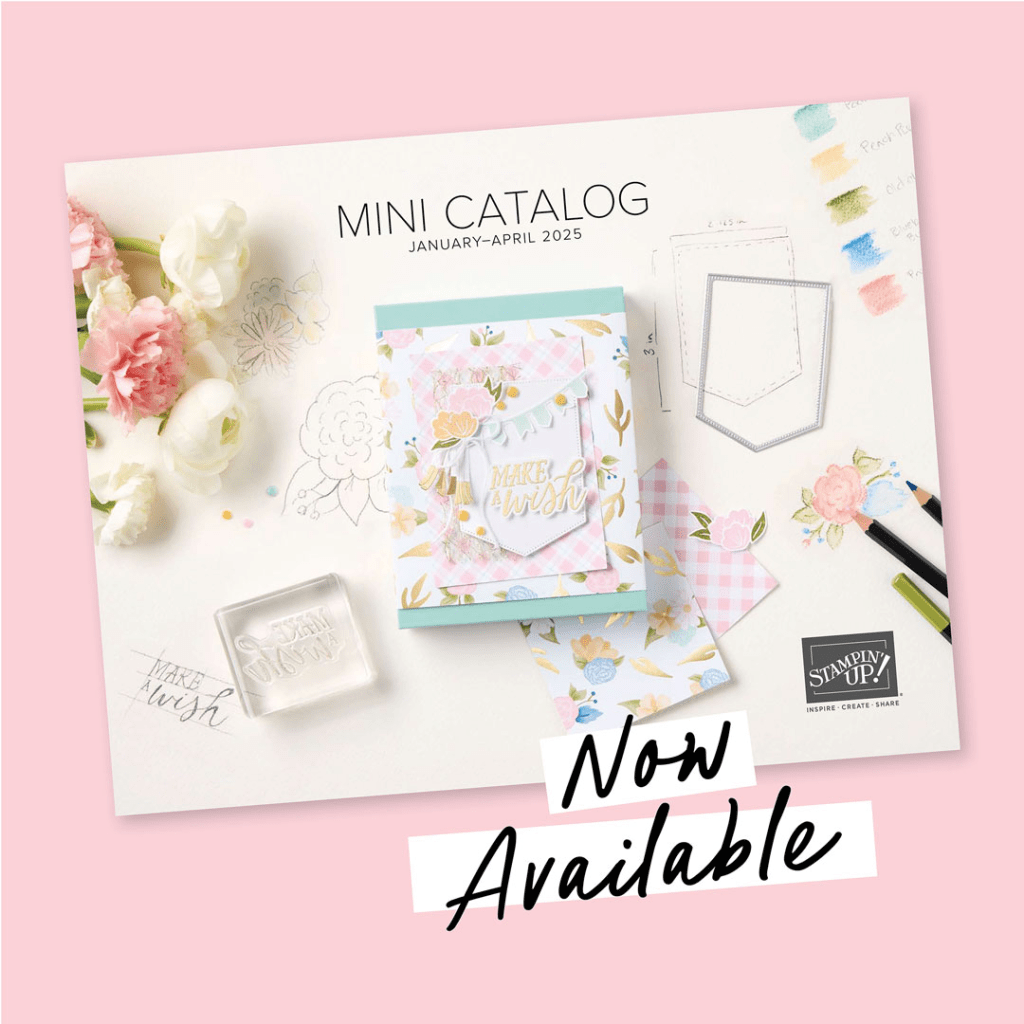
New Mini January to April Catalog – If you don’t have a physical copy of the new Mini and don’t already have a demonstrator, I’d love to get one to you. Use the link on the sidebar to the right or scroll all the way down if you’re on your phone for the link.
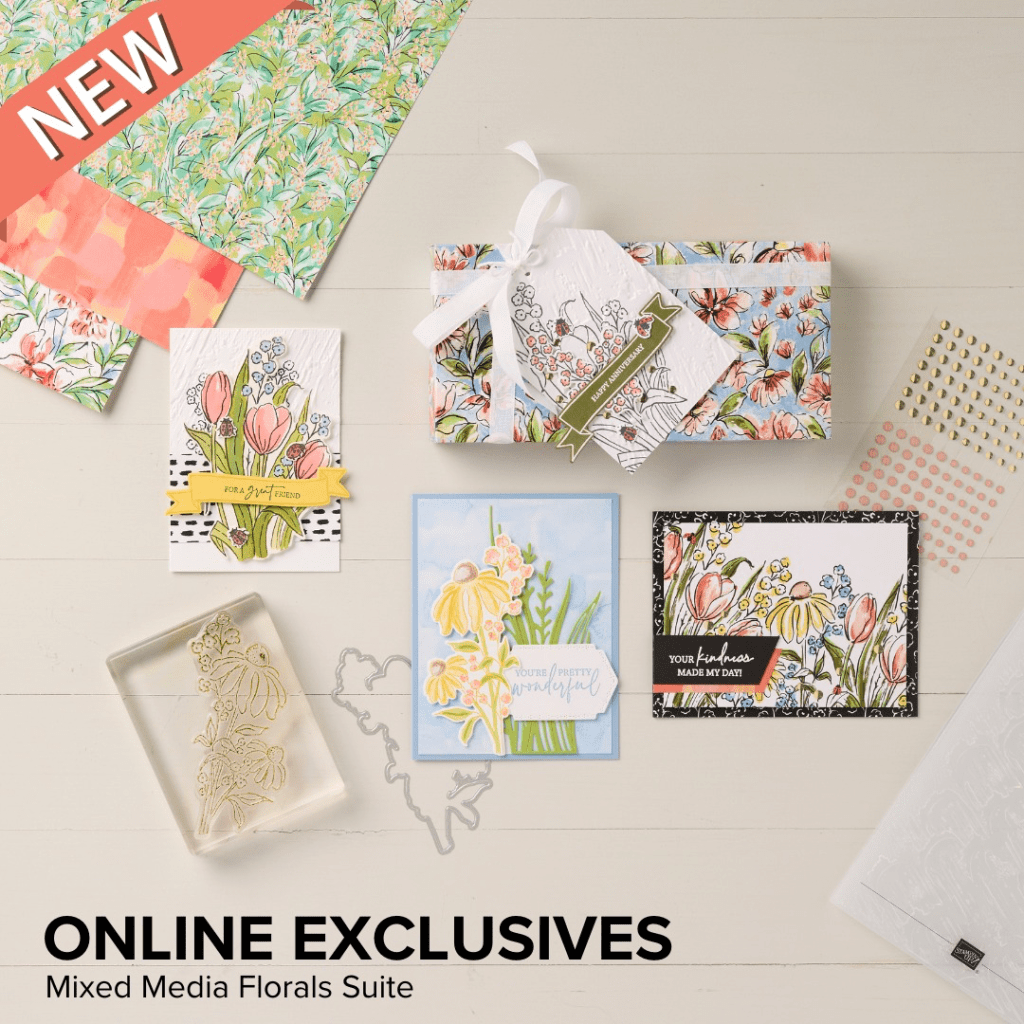
OnLine Exclusives – We simply do not have room and products can be more fluid, coming in and out of the line if they are not in a printed brochure so…online exclusives. What this does mean is that they can go out of stock and may and may not come back so if you really, really want something it might be time to get it while you can. On my shopping link go to SHOP NOW, click on MENU and select Online Exclusives.
Kits – We have two ways to get KITS (All-inclusive kits – you could get a pair of snips and a bone-folder but not essential). One type of kit is the Paper Pumpkin which is a subscription kit that comes direct to your mailbox once a month. You won’t know exactly what it’s going to be but it’s fun and always different. Paper Pumpkin must be ordered by the 10th of the month in which you want the kit.
The second kind of KITS are also all-inclusive but you know exactly what you’re getting, there’s no deadline and you can order any available kit anytime. Again, you might like a pair of paper snips and a bone-folder. Every month two or three new kits are released but there are several other options in stock, too. Sometimes the kits are 3-D projects, sometimes cards, sometimes notebooks/travel journal or birthday reminders like the Perpetual Beauty Calendar or the Card Keeper Kit. Below is a glimpse of the 3 new kits this month.
So, how fun is all that and I’ve just barely shown you all the ways to find stuff! In addition, we’ve got a fun SCAVENGER HUNT over on our Facebook page. Find the answers, message me and I’ll have a drawing for everyone who answers and finds the things in the scavenger hunt for a free stamp set or set of cards, your choice.
I want to wish you one and all a VERY HAPPY NEW YEAR!!
Have you created resolutions for the new year? Do you generally or is this a year to not do resolutions? Maybe instead you want to create new habits. Is there a distinction? I plan to read my Bible EVERY SINGLE DAY even if I just get one or two verses. Life can get busy, I realize that but what is truly important to you? Be sure it’s first. God, family, work, friends? In the comments, I’d love to know just ONE of your goals, resolutions, habits, or whatever it is you truly plan to DO this year.
My name is Patricia. I’m an Independent Stampin’ Up® demonstrator here in Alaska. I’ve got one more year as a teacher up in the village where I’ve been teaching for last few years. I teach 2nd and 3rd grade this year and LOVE it; however, living in the village is a hard life so I’ll be coming back home permanently after this school year or at least that’s my plan. My home is in Palmer, Alaska and that’s where I plan to be after this year. May or may not sign one more year contract.
So, I blog here periodically. Currently, I do not have a specified date and time because I have so many calls on my time. This year I hope and pray to be more consistent but not going to commit to exactly when or how often. After moving back home, I will likely be better at this.
Hopefully 2024 was a good year for you and 2025 will be better.
Now on to the Color Wheel from Stampin’ Up! Yes, we have a new color wheel that I think is going to be a wonderful tool for us as we try to put our cards or scrapbook pages colors together. Now it is easy to find colors if you’re using DSP (Designer Series Paper) because the colors are already all there but what if you’re using a single color or want a highlight color? Or just want to make your own DSP paper? Or want to use only cardstock?
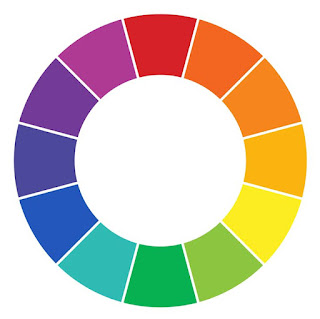
To begin, let’s look at the basic color wheel that we’re taught (usually) in school.
There are 12 colors in a basic color wheel which looks a lot like a beautiful rainbow. Stampin’ Up has taken it a step further by creating our own color wheel with Stampin’ Up colors (except Neutrals) though the Neutrals are all on the back.
Then SU (Stampin’ Up) helps us by giving us examples of color schemes and how to create our own.
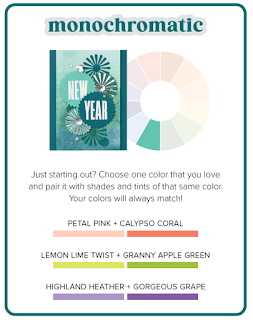
The first and easiest is Monocramatic which means “one” color scheme – for example Blues, Reds, or Greens. These basics are then broken down further into the shades between each of these – Blue/Green, Blue/Violet, Red/Orange, Yellow/Orange etc. Each of the Stampin’ Up colors radiates from these families. For example:
To use Monochromaticcolors in a project, you simply select a color that you like, for example, my favorite, blue then look at the colors within that family – Balmy Blue, Azure Afternoon, Misty Moonlight, Boho Blue, Blueberry Bushel & Night of Navy. Pick two or three colors from within that range & craft away!
The next color scheme is Analogous when you choose three colors that are next to each other on the color wheel. For example:
An Analogous color scheme is achieved by combining one color with its closest neighbors on the color wheel. By choosing Analogous colors for your creation, you’re ensuring a look of cohesion and harmony, as these combinations are known for their calming effect in artistic design.
And finally, there is the Triadic color scheme made by finding three colors equally spaced from each other around the color wheel.
These color combinations can feel somewhat predictable (think red, yellow, blue) as they are dynamic or maybe even unexpected. If you think of the color wheel as a dial, you can find a triadic color combination you like by shifting the dial one click at a time away from the primary hues. Then it’s a good idea to select a dominant color letting the other two colors play a supporting role on your card or page.
I am so excited for the new mini catalog, oh my!!! It’s got some truly fantastic Suites (a set of stamps, dies, DSP (Designer Series Paper), and more. The “more” often includes ribbon, some kind of dots or sequins or something like it. There are also some great Bundles, too. A Bundle is a stamp and die set or a stamp and punch set.
Sale-a-Bration starts on January 7th, too! What is Sale-a-Bration, you ask! It’s a once-a-year deal where when you purchase $60 or $120 or any product you get to choose a FREE item. This year we have free stamp sets, free DSP, free ribbon, free Bundles (for $120)!
PLUS some great new Online Exclusives – Online Exclusives are products that will only appear online, not in any catalog. This also means they can go away at any time unlike the Annual Catalog items which are available all year. I only say this because if there’s something you just HAVE to have you might want to get it sooner rather than later. It may be there for a while but may not. Just a heads up.
Kits – these are all-inclusive boxes with everything you need to complete a project. The only thing you might want to have in addition is a pair of paper snips. Kits make fantastic gifts, are great projects to travel with and wonderful for a parent or grandparent to work with a child for a fun time. Every month there will be 2 or 3 new kits.
This one is the PERPETUAL BEAUTY CALENDAR KIT. It’s fantastic for keeping track of birthdays and anniversaries. Keep with your greeting cards so you know who needs a card. And it’s beautiful to hang on the wall.
Here’s another kit, this one is for home decor. LAYERED LANDSCAPES KIT is a set of 4 frames to use all together or separately.
For the Layout (LO) below I used 2 pages from the Wildly Flowering DSP (Designer Series Paper) 12×12 paper, the Cloud Punch (for the snowballs) in the Clearance section, Frosted Forest Bundle for the tree die (cut a 12×12 white card stock in half, die cut by flipping the die over on about 2″ up on each end -see video), and the tree stamp for the post of the “Snowballs for Sale!!” sign. I used the Filled with Cheer stamp set and the Blender pen to color with Cherry Cobbler Ink Pad, Daffodil Delight Ink Pad, Old Olive Ink Pad, Boho Blue (or Balmy Blue) Ink Pad, Moody Mauve Ink Pad, Basic Black Blends to color the melting snowman.
For the LO below, I used a 12×12 Basic White for the base and the DSP are all from Regal Winter DSP paper pack. Berry Burst, Shaded Spruce, Wild Wheat, Boho Blue card stock plus some of the DSP for the circle punches in various sizes. Regal Flora is the stamp and die bundle used for the flower cluster and the die cut for the page title. For the die cut label I cut a Berry Burst and a white then switched the pieces so one is outlined in white and one in Berry Burst and vice versa.
What IS a Memory Keeper? Really it’s a scrapbooker but things always need to be fancy, hehe (or maybe it’s a secret code!!
I have kept a scrapbook since I was in college many, many long years ago. Back then it was just a 12×17 spiral bound book I got at some store and I filled it with all the bits and bobs of my life in college. It was fun, wasn’t anything really pretty but they did tell the story of my college years and I valued them. Then later in life I made digital scrapbooks. They were nice, they really were and again I loved them but they didn’t have a lot of LIFE!! Ok, they told of my life but it was a page and look at, maybe read the journaling but then on to the next page. BUT I’ve found something in between and absolutely love it. It’s paper journaling much like what I did in college but it’s got lots of colored papers, real design and moving parts and pieces. Makes the digital scrapping kind of boring…though I loved it at the time.
The good news about all this is that Stampin’ Up is really starting to get scrapbooking going again. We’ve got kits (if you need a quick scrapbook layout – a12x12 page 2-page spread) but there’s also much more!! We’re starting to see a lot of stamps made specifically for scrapbooking as opposed to card making which means they’re larger.
So the even better news is that I will start doing scrapbooking classes more often. We will do them at least twice a month. One workshop class will be with kits that we can put together as a group, visit, have fun and create either with or without your photos. The other workshop class will also be as a group, visit and have fun but we’ll be working on a spread together from scratch (using a layout). Both workshops classes will be FUN, CREATIVE and PRODUCTIVE!!
If you’re ready to do it leave a comment below or email me and I’ll let you know what and when. The first workshop class will be during Christmas break when I’m home (or if you’re ready to start now I’ll do a couple of on-line classes)…just let me know.
Thank you! And here we are into the holidays…Halloween, Thanksgiving, Christmas, New Years!! Wow, time goes so fast! Let’s keep those memories and the photos we take!
Still have a few questions about color theory and color coordination in crafting? You’re not alone! Check out the quick and easy answers to some of the most frequently asked questions on the subject.
Q: What is color theory, and why is it important in crafting?
A: Color theory is the study of how colors work together and how they affect the people who experience them. It’s important in crafting because color is a communication tool—a critical and unique part of the story you’re telling in any crafting or scrapbooking project!
Q: How do I choose a color palette for my scrapbooking project?
A: Choosing a color palette for your scrapbooking project can be fairly simple. First, look at the photos you want to include on the page and consider the colors in those images. Then, ask yourself what your project’s overall message is. Next, find a main color that supports that message and works well with your photos. Third, use the color wheel and the techniques laid out above to choose a palette to support it!
Q: What are the best color combinations for making handmade cards?
A: The best color combinations follow the color theory guidelines we’ve discussed previously, and best express the message you’re trying to send. Finding monochromatic, analogous, complementary, or triadic colors that speak to you and the receiver of your handmade card will always make your card design a hit!
Q: How can I effectively mix and match colors in DIY crafting kits?
A: Most DIY crafting kits, like the ones you’ll find at Stampin’ Up!, are designed to contain elements within a particular color family or palette already, making it incredibly easy to mix and match the supplies provided within. One tip, however, is to go back to what you learned about the color wheel. For example, if you have a ribbon from a separate kit that will work nicely in a monochromatic, analogous, complementary, or triadic way, don’t be afraid to bring it into the mix!
Q: What are some general tips for coordinating colors in handmade projects?
A: General tips for coordinating colors in handmade projects include using the four color schemes we learned about above. A simple starting point is to choose a color you love and then find other elements (paper, ink, markers, ribbons, etc.) of the same color but of varying saturation—thus creating a monochromatic color palette for your project.
Q: Where can I find color inspiration for my next crafting project?
A: Inspiration can come from many places, but we love seeking inspiration from nature—especially when it comes to finding the best color combinations. It’s also smart to look at the work of experienced crafters (try finding talented cardmakers who create in a style you enjoy on Instagram, for instance) and the professionals. Check out the Stampin’ Up! annual catalog and our Instagram or Pinterest account for plenty of color inspiration as well.
Q: What quick and easy color combinations work well in crafts?
A: Quick and easy color combinations are plentiful! Here are a few we love and that work for any number of crafts, occasions, or moods!
Turquoise + peach + violet
Fuschia + yellow-green
Bright red + hot pink
Royal blue + golden yellow
Yellow + pink + green
Be sure to refer to our Stampin’ Up! color wheel for more color combos (there’s one in the current Annual Catalog).
Get Creative With Color Coordinating in Crafts
Now that we’ve simplified color theory and color coordination in crafts, it’s time for you to get creative! What color combinations are you excited to try? Still looking for more card design inspiration? Ready to shop for perfectly coordinated colors of paper, ink, and other scrapbooking supplies? Shop or connect with me as a Stampin’ Up! Demonstrator today!