For the Layout (LO) below I used 2 pages from the Wildly Flowering DSP (Designer Series Paper) 12×12 paper, the Cloud Punch (for the snowballs) in the Clearance section, Frosted Forest Bundle for the tree die (cut a 12×12 white card stock in half, die cut by flipping the die over on about 2″ up on each end -see video), and the tree stamp for the post of the “Snowballs for Sale!!” sign. I used the Filled with Cheer stamp set and the Blender pen to color with Cherry Cobbler Ink Pad, Daffodil Delight Ink Pad, Old Olive Ink Pad, Boho Blue (or Balmy Blue) Ink Pad, Moody Mauve Ink Pad, Basic Black Blends to color the melting snowman.
For the LO below, I used a 12×12 Basic White for the base and the DSP are all from Regal Winter DSP paper pack. Berry Burst, Shaded Spruce, Wild Wheat, Boho Blue card stock plus some of the DSP for the circle punches in various sizes. Regal Flora is the stamp and die bundle used for the flower cluster and the die cut for the page title. For the die cut label I cut a Berry Burst and a white then switched the pieces so one is outlined in white and one in Berry Burst and vice versa.
What IS a Memory Keeper? Really it’s a scrapbooker but things always need to be fancy, hehe (or maybe it’s a secret code!!
I have kept a scrapbook since I was in college many, many long years ago. Back then it was just a 12×17 spiral bound book I got at some store and I filled it with all the bits and bobs of my life in college. It was fun, wasn’t anything really pretty but they did tell the story of my college years and I valued them. Then later in life I made digital scrapbooks. They were nice, they really were and again I loved them but they didn’t have a lot of LIFE!! Ok, they told of my life but it was a page and look at, maybe read the journaling but then on to the next page. BUT I’ve found something in between and absolutely love it. It’s paper journaling much like what I did in college but it’s got lots of colored papers, real design and moving parts and pieces. Makes the digital scrapping kind of boring…though I loved it at the time.
The good news about all this is that Stampin’ Up is really starting to get scrapbooking going again. We’ve got kits (if you need a quick scrapbook layout – a12x12 page 2-page spread) but there’s also much more!! We’re starting to see a lot of stamps made specifically for scrapbooking as opposed to card making which means they’re larger.
So the even better news is that I will start doing scrapbooking classes more often. We will do them at least twice a month. One workshop class will be with kits that we can put together as a group, visit, have fun and create either with or without your photos. The other workshop class will also be as a group, visit and have fun but we’ll be working on a spread together from scratch (using a layout). Both workshops classes will be FUN, CREATIVE and PRODUCTIVE!!
If you’re ready to do it leave a comment below or email me and I’ll let you know what and when. The first workshop class will be during Christmas break when I’m home (or if you’re ready to start now I’ll do a couple of on-line classes)…just let me know.
Thank you! And here we are into the holidays…Halloween, Thanksgiving, Christmas, New Years!! Wow, time goes so fast! Let’s keep those memories and the photos we take!
Still have a few questions about color theory and color coordination in crafting? You’re not alone! Check out the quick and easy answers to some of the most frequently asked questions on the subject.
Q: What is color theory, and why is it important in crafting?
A: Color theory is the study of how colors work together and how they affect the people who experience them. It’s important in crafting because color is a communication tool—a critical and unique part of the story you’re telling in any crafting or scrapbooking project!
Q: How do I choose a color palette for my scrapbooking project?
A: Choosing a color palette for your scrapbooking project can be fairly simple. First, look at the photos you want to include on the page and consider the colors in those images. Then, ask yourself what your project’s overall message is. Next, find a main color that supports that message and works well with your photos. Third, use the color wheel and the techniques laid out above to choose a palette to support it!
Q: What are the best color combinations for making handmade cards?
A: The best color combinations follow the color theory guidelines we’ve discussed previously, and best express the message you’re trying to send. Finding monochromatic, analogous, complementary, or triadic colors that speak to you and the receiver of your handmade card will always make your card design a hit!
Q: How can I effectively mix and match colors in DIY crafting kits?
A: Most DIY crafting kits, like the ones you’ll find at Stampin’ Up!, are designed to contain elements within a particular color family or palette already, making it incredibly easy to mix and match the supplies provided within. One tip, however, is to go back to what you learned about the color wheel. For example, if you have a ribbon from a separate kit that will work nicely in a monochromatic, analogous, complementary, or triadic way, don’t be afraid to bring it into the mix!
Q: What are some general tips for coordinating colors in handmade projects?
A: General tips for coordinating colors in handmade projects include using the four color schemes we learned about above. A simple starting point is to choose a color you love and then find other elements (paper, ink, markers, ribbons, etc.) of the same color but of varying saturation—thus creating a monochromatic color palette for your project.
Q: Where can I find color inspiration for my next crafting project?
A: Inspiration can come from many places, but we love seeking inspiration from nature—especially when it comes to finding the best color combinations. It’s also smart to look at the work of experienced crafters (try finding talented cardmakers who create in a style you enjoy on Instagram, for instance) and the professionals. Check out the Stampin’ Up! annual catalog and our Instagram or Pinterest account for plenty of color inspiration as well.
Q: What quick and easy color combinations work well in crafts?
A: Quick and easy color combinations are plentiful! Here are a few we love and that work for any number of crafts, occasions, or moods!
Turquoise + peach + violet
Fuschia + yellow-green
Bright red + hot pink
Royal blue + golden yellow
Yellow + pink + green
Be sure to refer to our Stampin’ Up! color wheel for more color combos (there’s one in the current Annual Catalog).
Get Creative With Color Coordinating in Crafts
Now that we’ve simplified color theory and color coordination in crafts, it’s time for you to get creative! What color combinations are you excited to try? Still looking for more card design inspiration? Ready to shop for perfectly coordinated colors of paper, ink, and other scrapbooking supplies? Shop or connect with me as a Stampin’ Up! Demonstrator today!
One of our favorite tips for color-coordinating in crafts is to look to nature. When in doubt, look at how colors appear in the natural world—it’s hard to go wrong by applying this advice to a craft project. You may be surprised to see how often the color combinations you come across on a walk or while looking through outdoor vacation photos align with what you’ve learned about color theory and the color wheel so far.
Take, for example, the lilacs that bloom in the springtime. The naturally occurring fuschia shades are directly across the wheel from the color found in their bright green leaves! Try this with other flowers, vistas, and even animals—you’ll soon understand why so many artists love and find inspiration in the great outdoors.
Another simple trick for how to coordinate colors in crafting is to look for inspiration online. Plenty of crafters and artists love to share their work and we get to benefit from it. A quick search for pretty color combinations on Pinterest or checking out relevant hashtags on Instagram can give you tons of color inspiration for scrapbooking and cardmaking.
Our last, and maybe most helpful, hack for coordinating colors in crafting is to use the color wheel created by Stampin’ Up! for this exact purpose. Think of it as a cheat sheet that reveals innumerable color combinations that perfectly align with the products you already own or can easily shop for after falling in love with a particular palette. Incorporating all our color collections—Brights, Neutrals, Regals, and Subtles—the Stampin’ Up! color wheel follows the same rules as the original but with more dynamic and plentiful results.
Explore it using the rules you learned about monochromatic, analogous, complementary, and triadic colors to find unexpected new color combinations for your next crafting project!
Crafting with Color: Best Practices and Combinations
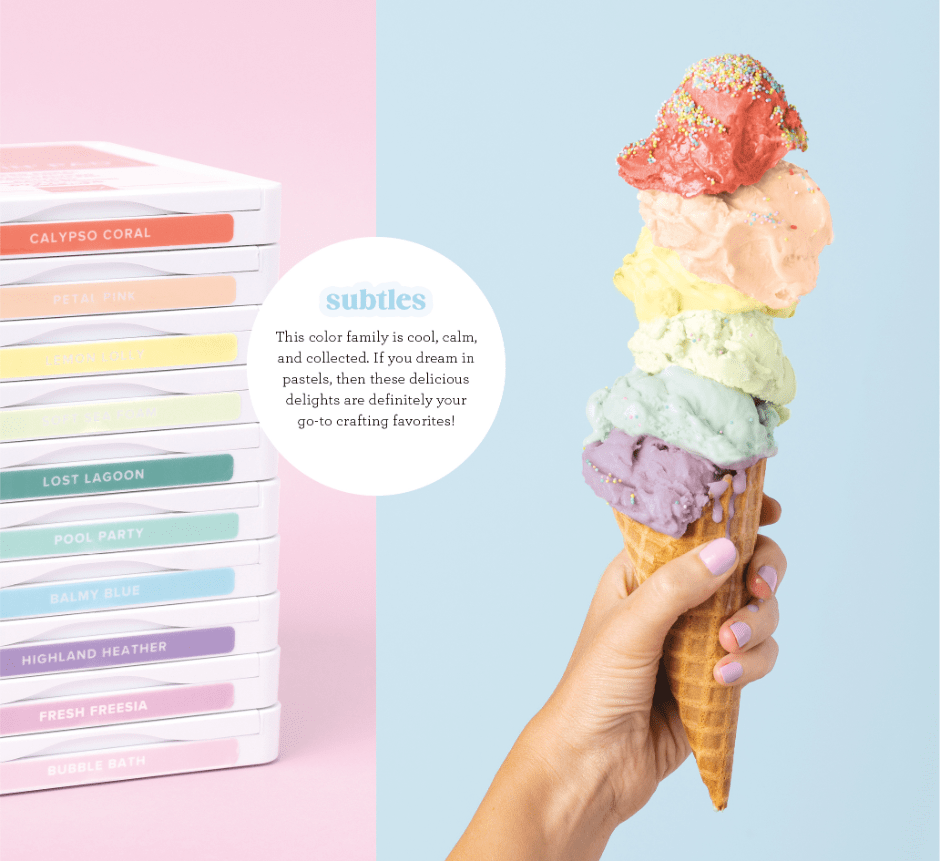
Stampin’ Up! has made it super easy to use best practices when it comes to color coordination in crafting. Because the best color combinations in scrapbooking follow color theory guidelines, we have created color families that perfectly coordinate no matter the occasion.
Consider our Subtles line—it’s a combination of calming colors that still breathe a little life and joy into whatever sentiment you want to capture in your project.
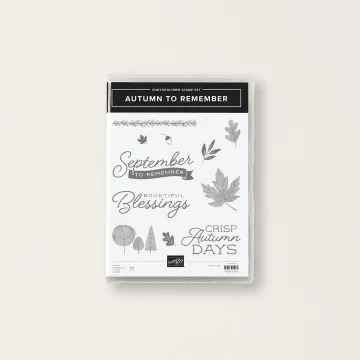
Utilizing Step-by-Step Stampin’ Up! kits is another great way to produce a variety of crafts and scrapbooking projects with purposefully complementary elements every time. This is a great option for beginners who don’t yet feel confident in their ability to find the best color combos or for the busy maker who enjoys the convenience of well-thought-out supplies and materials. This Love This Memory Notebook Kit is a great example!
Our best advice when it comes to crafting with color? Experiment! Playing around with color combinations that speak to you or whoever else you may be creating for is one of the best parts of the creative process. This often leads to the production of unique and heartfelt creations that wouldn’t exist without the joy of your own discovery.
Check back tomorrow for: Frequently Asked Questions: Color Coordinating in Crafts and Scrapbooking
Bonus Days starts tomorrow! During Bonus Days, when you shop and spend $50 between 3–31 July you will earn a $5 coupon! You can then redeem your coupon (or coupons) between 1–31 August. Your coupon codes will be emailed to you, so make sure all your account information is accurate at checkout. Shop the online store and products from our current catalog, Online Exclusives, Kits Collection, and more!
Are you a Paper Pumpkin subscriber, I know that you love crafty things. Who doesn’t? You also appreciate great value and you’re probably looking for the next best thing to add to your craft collection. So, I wanted to make sure that you’re in the know about our incredible Bonus Days promotion!
Earn coupons by purchasing a 3-, 6-, or 12-month Paper Pumpkin prepaid subscriptions (or by adding a 1-month prepaid subscription to your order to reach $50). Then redeem your coupons in August and apply them toward a month-to-month Paper Pumpkin subscription or new prepaid subscriptions.
Talk to me if you need help!! Go to StampinWithPatricia.StampinUp.net to order!
A template is essentially a place to start. It’s a layout for a card that you can use to help you get the creative juices flowing. Let’s say you have a product (stamp set) you’d really like to use but just aren’t sure about what to do. One thing you can do is to look at page 22 of the new annual catalog and there are some fantastic templates like the white images below. Then, however it seems to work for you, make a card from it. It doesn’t have to be exact, it’s just a starting point but it’s a repeatable layout for many, many stamp sets, colors, DSP and so much more!!
I’ve decided to start a monthly challenge using two layouts.
June’s Creative Challenge is, I think, a great one—and sends us straight into the pages of the new May 2024–April 2025 Annual Catalog! The catalog itself is full of beautiful samples that can provide you with endless creative inspiration.
And have you seen the 20+ card templates on the bottom of page 22? These super-helpful patterns/layouts can streamline your card making process, so all you have to do is choose which fabulous new stamps, ink colors, Designer Series Paper, and embellishments you’ll use with them.
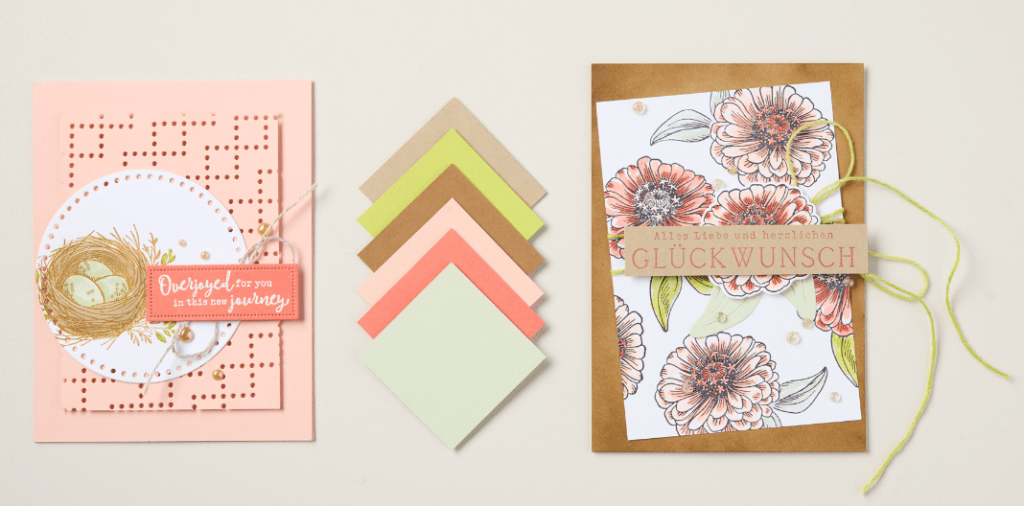
First up: the You’re Such a Blessing card with its showstopper focal point. It does a perfect job of highlighting the caring sentiment from the Grateful Blessing Stamp Set. To achieve this card’s sophisticated, distressed look, emboss Crumb Cake Cardstock using the Layered Floral 3D Embossing Folder and the Stampin’ Cut & Emboss Machine, then rub VersaMark ink over the embossed paper. Cut the circle for the sentiment using the Spotlight on Nature Dies to get those intricate and lovely border details. And those tasty-looking citrus fruits, plus their leaves and flowers? They were simply fussy cut from the Mediterranean Blooms Designer Series Paper. Cards come together so easily when you have a pattern to follow!
The Hey, You Can Do This card features another template with lots of fun layers—and it’s very easy to CASE (Copy and Share Everything). To get the look featured here, use the Saying Hey Stamp Set, the Eyelet 3D Embossing Folder, Country Lace and Full of Life Designer Series Papers, Basics Wow! Embossing Powder (white), Blueberry Bushel, Coastal Cabana, and Pool Party Cardstock, and Ombre Matte Decorative Dots. It’s a perfect mix of products, and with the template as your card making guide—you can’t miss!
Have fun using these amazing templates! I hope you’ll choose one (or both!) of the sketches we featured today, make a project with it, and share it using the #CreativeChallengeSU hashtag. I can’t wait to see it on our FB pages either StampinWithPatricia or StampinwithPatricia (weird that the only difference is an uppercase W or lowercase w.
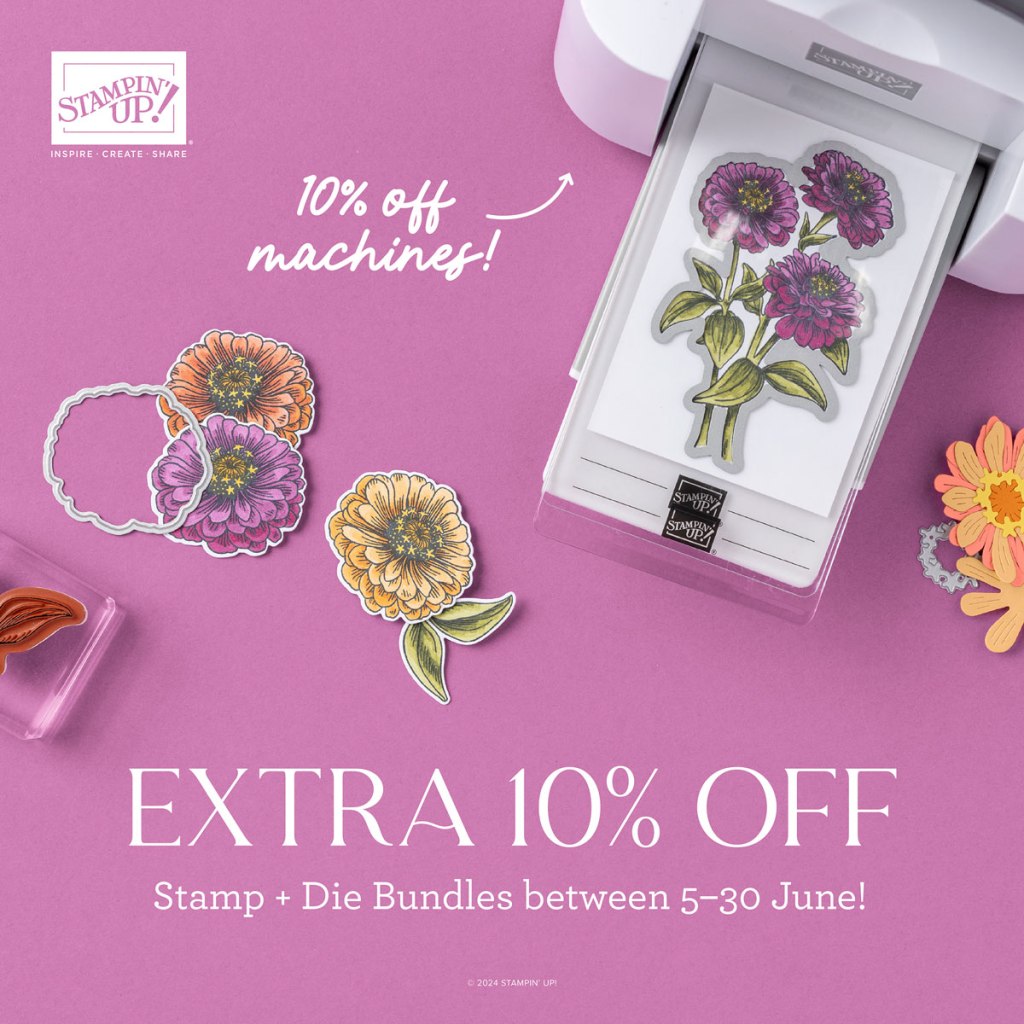
Starting tomorrow, June 5th through June 30th you will save an extra 10% on bundles (stamp sets and dies) and the Stampin Cut & Emboss machine (regular size and mini). Have you been eyeing a machine to cut your dies, emboss your cardstock for those great cards you’re making. Now is certainly the time to get it.
Which size machine should you get? If you’re only planning to get one, then for sure get the regular machine. Not only because it can cut & emboss all sizes but because it’s a truly wonderful workhorse of a machine.The mini is wonderful if you travel to workshops or travel in general and want to have your tools with you for crafting (I love to craft when I’m traveling while listening to a book on my iPad).
You already save 10% on bundles now so with the added 10% from June 5-30 that is 20% savings.
Look over your wish list and check out the annual catalog so you will be ready to place your order in June!
From 1–31 May, anyone who joins Stampin’ Up! will receive FOUR 2024–2026 In Color packs for FREE! What a great bonus! Including Stamp Pads, Cardstock, DSP and Markers
New demonstrators still get to choose their choice of $125 USD worth of products for only $99 USD.
Know anyone that is looking to have more creative experiences? Invite them to join our team with you!!
To learn more about this offer and get started get in touch with me (StampinWithPatricia@outlook.com)
FAQs
Check out our frequently asked questions below to learn more about becoming a Stampin’ Up! demonstrator.
Who is Stampin’ Up! and why would I want to join as a demonstrator?
Stampin’ Up! is an inclusive, global community made up of independent demonstrators and their customers—paper crafters who support one another in creativity and in life! Many come to us for our products and then join because of the connection and relationships they find. As a Stampin’ Up! demonstrator, you’ll be making a difference in people’s lives by helping them enjoy fun, worthwhile accomplishments using high-quality stamps, ink, and paper. Stampin’ Up! has been selling stamps and paper crafting supplies in North America for over 35 years—since 1988! During that time, we’ve won industry awards and accolades, gained loyal demonstrators and customers, and expanded to Europe and the South Pacific.
What are the perks of joining?
As a new demonstrator with the Bronze title, you will receive a 20% discount. You’ll get VIP access and be first to see new products, have the opportunity to attend company events, and be part of a creative community that spans the globe. You’ll also have access to demonstrator-only Facebook groups, training resources like Stampin’ University and Succeed Weekly (our weekly demonstrator email), the opportunity to have your own online demonstrator storefront via Demonstrator Business Web Services (DBWS), and more. In addition, you’ll have access to our world-class Demonstrator Support and Demonstrator Experience teams who are available to help you with everything from placing orders to leveling up your business.
What are some of the ways I can participate as a demonstrator?
One of the best things about being a Stampin’ Up! demonstrator is that you get to choose your own adventure! You can simply enjoy the products and crafting on your own—or you can share with others, bringing friends together to share products and creative experiences. And, as mentioned earlier, their purchases can help you meet your minimums.
Over time, you may want to expand your crafting circle and become an influencer—adding a few customers and earning a modest, supplemental income. Eventually, you could even decide to become a business builder with a team of your own. Choose whatever Stampin’ Up! adventure suits you best and tailor your experience to meet your lifestyle!
How much does it cost to become a demonstrator?
Starter Kits are a great value at $99 plus tax and we throw in business supplies and FREE shipping as an added bonus.
Do I have to sell or build a team?
No! Feel free to choose your own adventure and run your Stampin’ Up! business YOUR way! In fact, all it takes to remain an active demonstrator is meeting the quarterly sales requirement. If you prefer, you can place your own orders and/or collect orders from family and friends to equal the quarterly sales minimum.
If you decide that you’d like to build a team of your own, there are benefits! One of them is the friendships that you can enjoy as you share Stampin’ Up! experiences together. Another is being able to qualify for team commissions on product orders that your team member(s) submit.
Are there any minimum sales requirements?
To continue to receive your discount and other demonstrator perks, you need to submit $300* in sales per quarter. Sales can be submitted in any amount—in other words, you don’t have to submit a $300 order all at once—and both your personal purchases and customer orders count toward your minimum. Exceptions include demonstrator business supply items, but nearly everything you purchase or sell will count. You can make these purchases yourself, of course, but sharing the fun of stamping with others can help you meet your minimum sales requirement.
Are there penalties?
If for any reason you decide to stop meeting your quarterly minimum sales requirement, you’ll lose your active status and “drop” as a Stampin’ Up! demonstrator. However, you will not be penalized and can sign up again any time! If you choose to come back, you can re-join with your current team leader. Please note that if you choose to sign up under a new team leader, there is a short waiting period.
I’m in! How do I get started?
Joining is an easy, two-step process: 1) Complete the sign-up form by either filling it out online or mailing it in and 2) select your Starter Kit contents. If you need help selecting products for your Starter Kit, your new team leader is a great resource. You can also call Demonstrator Support for great tips! I’ve got more questions.
Whom should I contact?
Your new team leader (me-Patricia Houser email – StampinWithPatricia@outlook.com) will be your best resource for any questions you may have. You can also contact Demonstrator Support at 1-800-STAMP-UP or ds@stampinup.com. Our agents will be very happy to assist you!
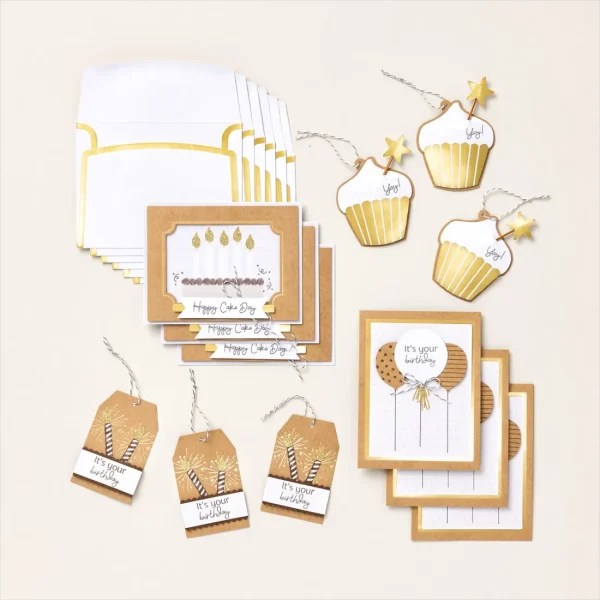
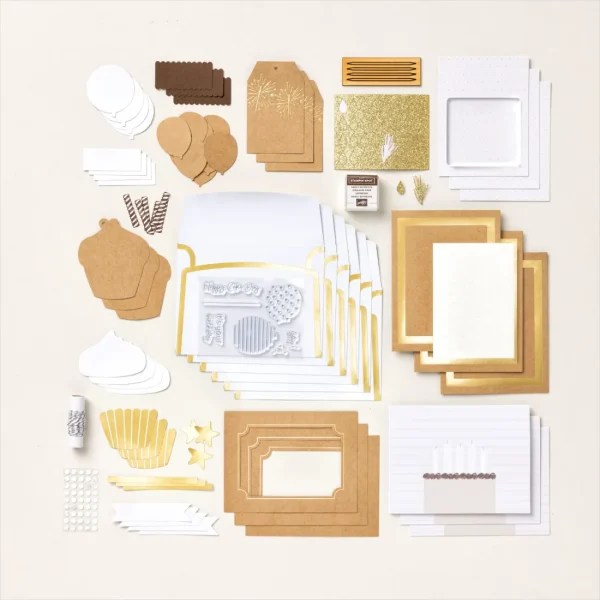
NEW & AVAILABLE NOW! Create glittering birthday cards and gift tags with the Birthday Sparkle Kit! This kit includes six cards and six gift tags. Create each project with the included stamp set, die-cut paper pieces, and twine. It also includes other elements such as glitter stickers, pressed wood picks, coordinating envelopes, and gold foil paper pieces! It’s easy to create each project for your recipient or get ahead on your crafting for the year by making quick multiples. Either way, you’ve got a special paper craft that your recipients will love!
Item 163865 | $23.00
The Birthday Sparkle Kit includes:
Birthday Sparkle Photopolymer Stamp Set
Clear Stamp Block
Early Espresso Stampin’ Spot
Predesigned projects
Step-by-step instructions
Precut pieces (No prep work! Get right to crafting)
Make 6 cards and 6 gift tags
Cards: 3 each of 2 designs; folded card 5-1/2″ x 4-1/4″
Gift tags: 3 each of 2 designs; largest tag 2-1/4″ x 3-1/2″
6 preprinted envelopes
Enough adhesive to complete projects
Gold glitter stickers and pressed wood picks.
Baker’s Twine in Early Espresso and White
A 9-7/8″ x 6-1/2″ x 2-3/4″ printed designer box for storage or crafting on the go
$23 (163865)
Product colors: Basic White, Crumb Cake, Early Espresso, gold glitter
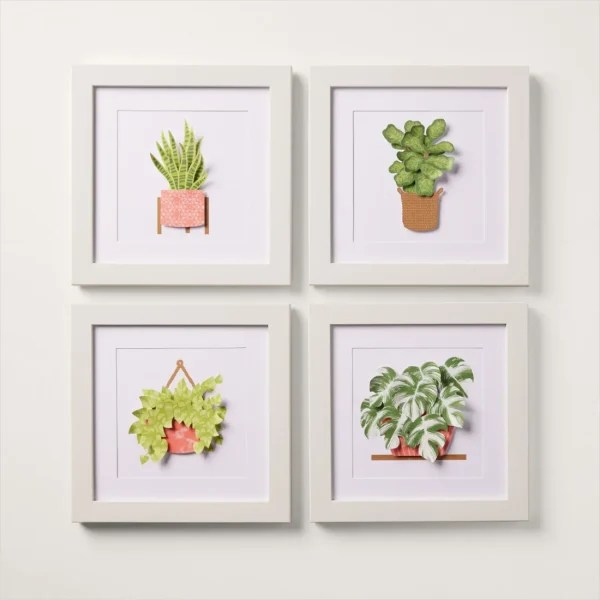
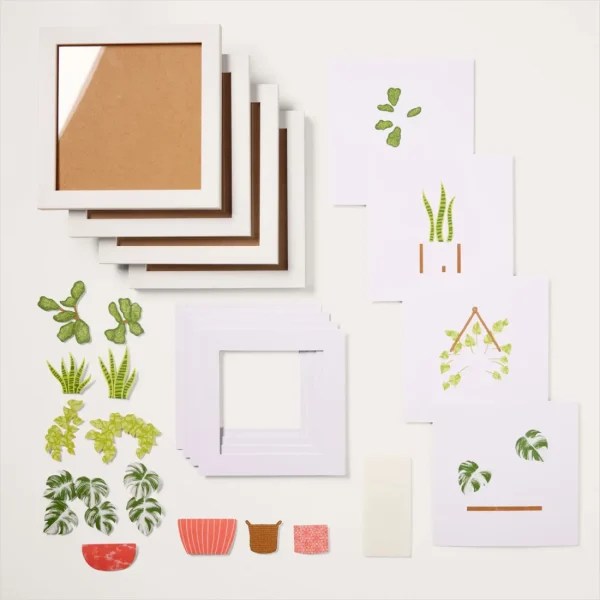
Calling all plant lovers! The Happy Houseplants Kit is an adorable home decor crafting kit! This kit comes with four 6″ x 6″ (15.2 x 15.2 cm) white frames and precut paper pieces for you to curl and assemble inside the frame. You’ll end up with four coordinated houseplant decor pieces. They can stand by themselves, or you can hang them on your wall. Either way, your houseguests will be amazed that you created it yourself!
Item 163873 | $25
The Happy Houseplants Kit includes:
Predesigned projects
Step-by-step instructions
Precut pieces (No prep work! Get right to crafting)
4 white frames
Frame size: 7-1/8″ x 7-1/8″ x 7/16″
Enough adhesive to complete projects
A 7-3/4″ x 7-1/2″ x 3″ printed designer box for storage or crafting on the go
$25 (163873)
Product colors: Calypso Coral, Garden Green, Granny Apple Green, Lemon Lime Twist, Pecan Pie
Be sure to check out all the other kits plus the monthly subscription kit directly to your mail every month (Paper Pumpkin).
Also, remember right now till the end of February we’re in the midst of our biggest sale of the year. Sale-A-Bration is amazing…every $50 or $100 you spend you get to choose a FREE item – stamp sets, dies, ribbon, DSP (Designer Series Papers), and more!! There’s even a punch that has just been added.
We’re excited to announce some new items available for FREE when you make a $50 or $100 purchase. Starting today! Listed below!
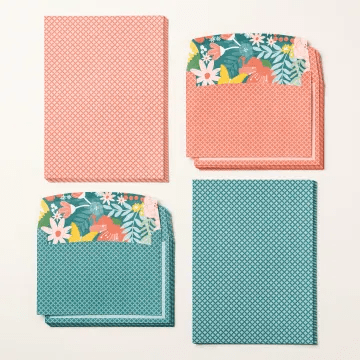
Sweet Thoughts Memories and More Cards & Envelopes – 165711
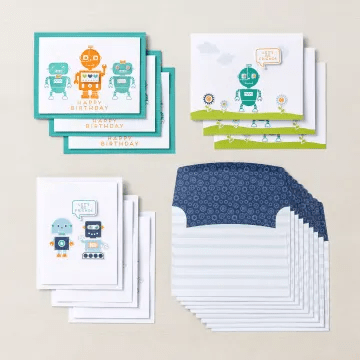
Robot Buddies Kids Card Kit – 165698
Just Kiddin’ 12 x 12 DSP – 165712
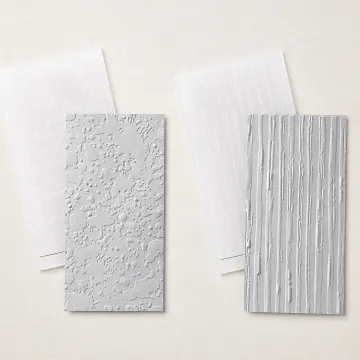
Stripes & Splatters 3D Embossing Folders – 165707
Love This Memory Notebook Kit – 165701
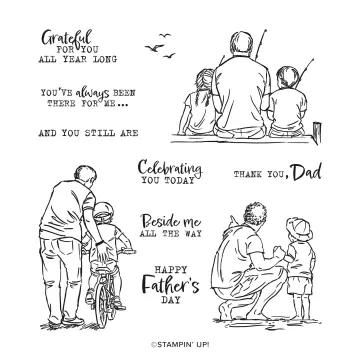
Beside Me Cling Stamp Set – 165709
Join Now
If you’ve been thinking about becoming a Stampin’ Up! demonstrator, then there’s no better time than right now during Sale-A-Bration! Join by February 29th, 2024 and choose between two fabulous offers:
Option 1: Get $125 worth of product PLUS our new Stampin’ Glass Mat Studio (a $60 value) for just $99 (shown below)!
Option 2: Get $125 worth of product PLUS an additional $30 worth of product of your choice when you join for $99. That’s a $155 value!
Don’t wait! Talk to your demonstrator today or click the JOIN STAMPIN’ UP! button to begin your creative journey!
With either option above there are additional benefits galore…free shipping, a free Paper Pumpkin, business paperwork (should you decide to make it a business), a 20% discount on future purchases while you remain a demonstrator plus you get all benefits offered to your customers, even if you’re your only customer.
We design our products with all crafter skill levels in mind. Whether you’re a beginner or have been stamping for years, we’ve got something for everyone. Our selection of ink, paper, product suites, stamps, and more will make it easy for you and your customers to create gorgeous paper crafts. We even have a vast array of dynamic, specialized tools and products that will help you share your love of crafting with everyone you know.
As a demonstrator, you get incredible product perks! This includes product discounts, exclusive products designed just for demonstrators, early access to new products, earning product credit to use throughout the year, and more! With these perks, you’ll quickly master how to use our products for your business.