Do you scrapbook your photos? Do you scrapbook events in your life? Do you scrapbook the kids or the grandkids…depending on where you are in your life? I made my first scrapbooks (I made four – one for each year of college) in a big spiral-bound books (probably 12 x 12 with plain gray paper) in college. I had them for many years and think I still have one or two of them. It’s fun to look back on those and remember my time in college. Amazing how quickly you forget but bringing the memories back is so much fun.
Stampin’ Up has the most amazing papers, DSP (Designer Series Paper) that can make AMAZING scrapbook pages. I’m going to be posting some photos of the pages I make (no photos included) every now and again. Here’s one I made today. None of this is glued down yet so perfectly set on the page.
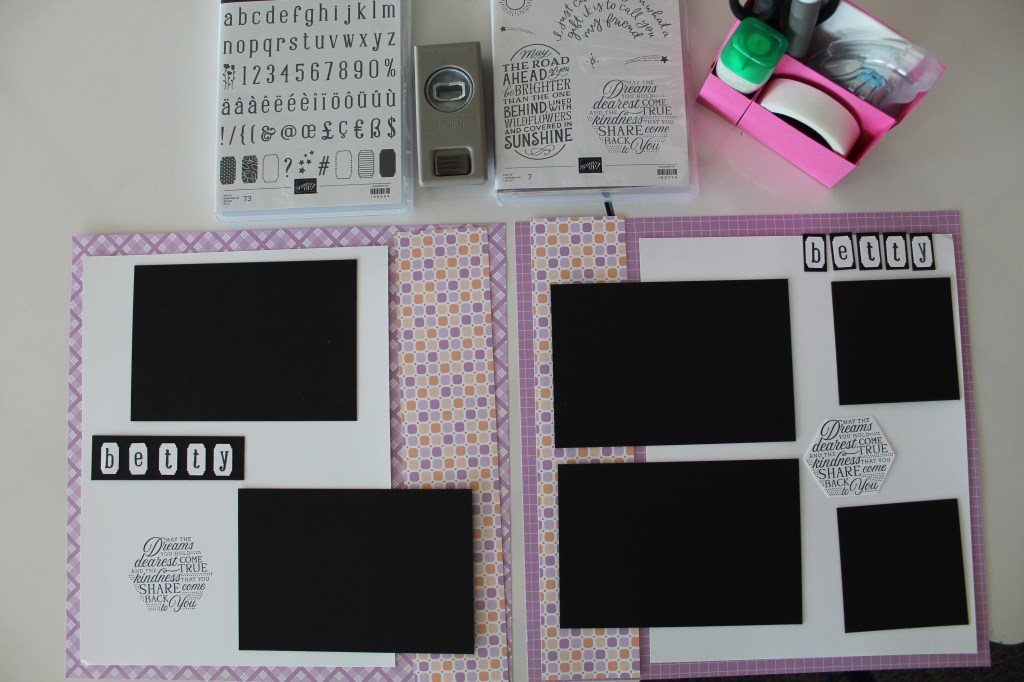
I will mostly post 12″x12″ pages. I start with a 12″x12″ page of DSP, cut a strip of coordinating DSP at 2.5″ x 12″. Place that coordinating strip on the left or right. I then used a full page (8.5″x11) of basic white, on the other side. The FANTASTIC thing about 12″x12″ pages that if you have a 12″x12″ photo frame you can post the layout for a few days or weeks till you do a new one and then put the old one in the scrapbook and display the new one in the frame(s).
In this case I cut photo frames in black (4.25″ x 6.25″) to hold 4×6 photos. If you use some other size of photos just add 1/4″ of an inch in each direction and cut your frame layer. Move the elements around until you find the layout that works for you. It probably goes without saying but the frame for your photos can match the page I just use black because that’s what I have. I also included a couple of 3×3 photo frames so cut them 3.25″ x 3.25″.
For best results I usually cut the frames and maybe even a couple of extra ones and BEFORE gluing anything down I start playing with the layout. If you want a stamped sentiment somewhere on your page be sure you account for that in your layout. Or if you want to include a name like I did on these pages stamp, punch or cut-out so you also place it around on the layout, too.
Also stamp your sentiments either on a piece of card stock to move around when you’re playing with layout and then either use that OR be sure to stamp before you glue it down so if you mess it up you can turn your page over and use the back.
For this layout I used Covered In Sunshine Stamp Set and Alphabest Stamp Set along with the Best Label Punch seen above in the photo.
